
Computer Peripherals: What They Are and Why They Matter
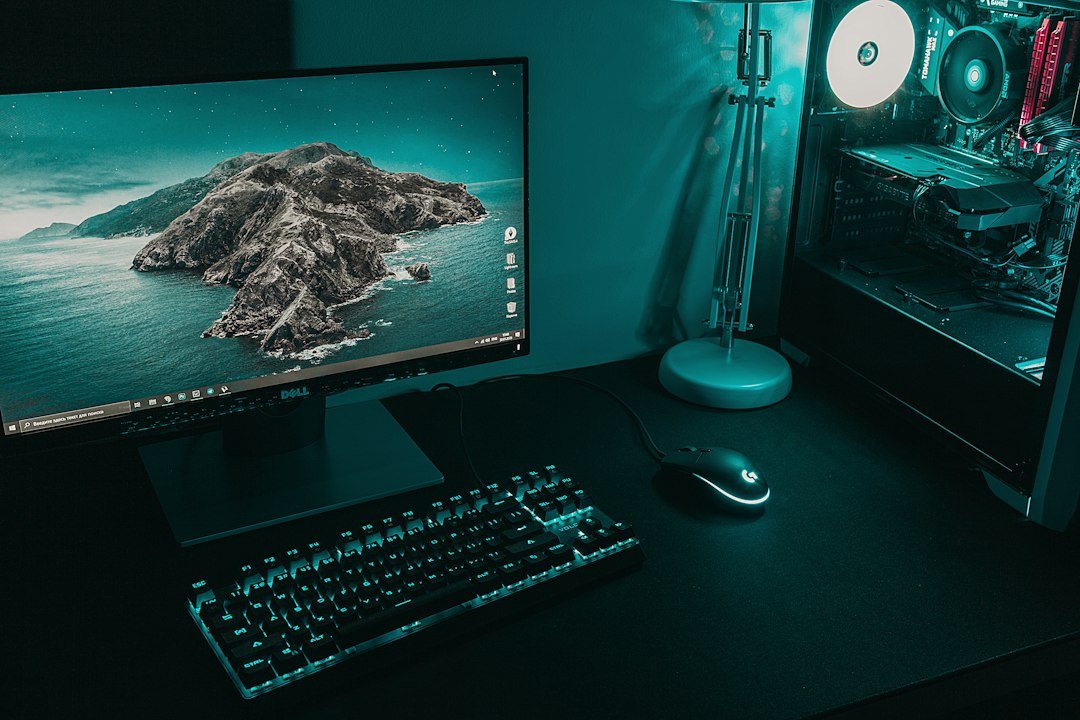
A Computer Peripheral is any external device that connects to a computer to add functionality beyond the core system. They handle input, output, storage, or communication, and they let you interact with your machine in ways the internal hardware alone can’t provide. Think of a keyboard, mouse, or external drive as a peripheral that expands what your computer can do.
While the computer’s CPU, memory, and motherboard are the core, peripherals make the system practical for everyday tasks and gaming. They translate your actions into data the computer can process and send the results back to you in a readable form.
Key Takeaways
- Peripherals fall into four main categories: input, output, storage, and communication.
- Choosing the right peripheral depends on your use case – gaming, content creation, or general productivity.
- Quality and compatibility are critical; check connectivity types and driver support.
How Are Computer Peripherals Classified?
According to the GeeksforGeeks overview, peripherals are grouped into four basic types:
- Input Devices – convert user data into signals the computer can understand.
- Output Devices – translate computer data back into human‑readable formats.
- Storage Devices – hold data persistently for later use.
- Communication Devices – enable data exchange between computers or networks.
Each category serves a distinct role, and many devices combine functions (e.g., a webcam is both input and output).
Common Input Peripherals for Gamers and Tech Users
The most frequent input peripherals you’ll encounter include:
- Keyboard – essential for typing and gaming commands.
- Mouse – critical for precision control in most PC games.
- Gamepad – offers an alternative control scheme for console‑style gameplay.
- Microphone – lets you communicate with teammates or record audio.
- Webcam – provides video input for streaming or video calls.
For gamers, a keyboard and mouse are the core of a responsive setup. If you prefer a controller, a gamepad can replace or supplement them.
Output Peripherals: Seeing and Hearing the Results
Output devices let the computer display or play the data it has processed. Common examples:
- Monitor – visual output for all tasks.
- Speakers or Headphones – audio output for music, games, or calls.
- VR headset – immersive visual and audio output for virtual reality experiences.
Choosing the right monitor or audio setup depends on resolution, refresh rate, and sound quality needs.
Storage Peripherals: Keeping Your Data Safe
External storage expands your ability to save and transfer files. Typical types:
- USB flash drives – portable, small, and easy to use.
- External hard drives (HDD/SSD) – larger capacity for backups or media libraries.
- Network Attached Storage (NAS) – shared storage over a network.
When selecting storage, consider capacity, speed, and durability. SSDs offer faster read/write speeds but are more expensive per gigabyte than HDDs.
Communication Peripherals: Connecting with the World
These devices enable data exchange beyond the local machine:
- Network cards (Wi‑Fi or Ethernet) – connect to the internet or local networks.
- Bluetooth adapters – pair with wireless peripherals like headsets or keyboards.
- Modems – provide internet access over phone lines or cable.
Modern PCs often include built‑in Wi‑Fi and Bluetooth, but external adapters can improve range or speed.
How to Pick the Right Peripherals for Your Setup
Choosing peripherals is a balance between performance, compatibility, and budget. Use this decision checklist:
- Define your primary use case. Gaming, content creation, or general office work will dictate which devices matter most.
- Check connectivity. USB‑C, USB‑A, or wireless? Make sure your PC has the right ports.
- Consider driver support. Devices that ship with open drivers or are recognized by your OS reduce setup hassle.
- Read reviews for latency and accuracy. Especially for gaming mice and keyboards.
- Test if possible. Many retailers allow you to try a keyboard or mouse before buying.
For example, a gamer looking for a low‑latency mouse should look at DPI settings and polling rate. A content creator may prioritize a high‑resolution monitor and color accuracy.
Common Mistakes When Buying Computer Peripherals
- Ignoring compatibility. A USB‑C mouse won’t work on a laptop with only USB‑A ports.
- Overlooking ergonomics. A poorly designed keyboard can cause strain over long sessions.
- Assuming all peripherals are the same. A mechanical keyboard feels and sounds different from a membrane one.
Avoid these pitfalls by checking specs and trying devices before committing.
What to Do Next
Now that you know the main peripheral categories and how to evaluate them, you can start building a setup that fits your needs. Try testing a keyboard or mouse on a free online click‑speed tool to see how it feels in real time. If you’re a gamer, look at the OLED display guide to pair a monitor that matches your peripheral performance.
Choosing the Right Mouse: Ergonomics vs. Performance
When it comes to a mouse, you’re balancing comfort and precision. If you type a lot, a vertical or contoured mouse can reduce wrist strain. If you game, look for a sensor with at least 10,000 dpi and adjustable polling rates. The rule of thumb: use an ergonomic model for long‑hand typing sessions, and a high‑speed gaming mouse for fast‑action play.
Key Specs to Compare
- DPI (dots per inch) – higher values give more cursor speed; 3,000–6,000 is fine for office work, 10,000+ for gaming.
- Polling rate – measured in Hz; 125 Hz is standard, 500 Hz or 1,000 Hz reduces latency.
- Weight and balance – a heavier mouse can feel more stable, but may tire the hand.
- Button layout – programmable buttons help in games; fewer buttons keep the mouse simple for everyday use.
Common mistake: buying a cheap mouse that looks good but has a low‑quality sensor. The sensor is the core of performance; a cheap sensor can wobble or miscount clicks, leading to frustration.
Keyboard Choices: Mechanical vs. Membrane
Mechanical keyboards feel clicky and respond faster than membrane ones. If you type over 30 k words a month, the tactile feedback can reduce fatigue. Gamers often prefer mechanical switches with short travel for quick key presses. If you’re on a budget or need a quieter desk, a high‑quality membrane keyboard may suffice.
Switch Types Explained
- Cherry MX Red – smooth, light, no click noise.
- Cherry MX Brown – tactile bump, moderate noise.
- Cherry MX Blue – clicky sound, tactile bump.
- Topre – electro‑static, very quiet, premium feel.
Decision rule: if you want a quiet office environment, pick a Brown or Topre. If you need speed and feel, pick a Red or Blue. If you’re unsure, try a keyboard with a removable switch plate or a switch tester before buying.
Display Monitors: Size, Resolution, and Refresh Rate
Choosing a monitor depends on what you’ll use it for. For coding, a 27‑inch 1440p panel gives plenty of screen real estate without pixelation. For gaming, a 144 Hz or 240 Hz panel with a 1 ms response time offers smooth motion. For design work, a 4K panel with high color accuracy (80 % DCI‑P3 or better) is ideal.
Practical Checklist
- Screen size – 24‑27 inches for most office tasks; 32+ inches for immersive gaming or dual‑monitor setups.
- Resolution – 1080p is fine for text; 1440p adds clarity; 4K for detailed design.
- Refresh rate – 60 Hz for office, 120 Hz+ for gaming.
- Panel type – IPS for color accuracy, VA for contrast, TN for lowest latency.
- Connectivity – HDMI 2.0/2.1, DisplayPort 1.4, USB‑C for future‑proofing.
Edge case: if you have a small desk, a 27‑inch monitor may crowd the space. In that case, a 24‑inch panel with a stand that can tilt and swivel helps keep ergonomics.
Audio Peripherals: Headsets vs. Speakers
Headsets give you privacy and are great for gaming or video calls. Speakers can fill a room and are better for media consumption. The trade‑off is cost and space: a high‑end speaker set can cost more than a good headset, but a headset is a single unit that takes up no desk space.
Choosing the Right Driver Size
- 10–12 mm drivers – common in gaming headsets; balanced bass and mids.
- 15–20 mm drivers – larger drivers produce deeper bass; often found in premium headsets.
- 10‑inch drivers – used in studio monitors; ideal for detailed audio work.
Common mistake: buying a headset that claims “surround sound” but only uses stereo. Look for true 7.1 virtual surround or a headset with multiple drivers per ear for an immersive experience.
Storage Peripherals: SSD vs. HDD vs. External Drives
For speed, use an NVMe SSD inside the case; it’s 3–5× faster than a SATA SSD. If you need cheap bulk storage, a 2.5‑inch SATA HDD is still relevant. External drives are handy for backups and file sharing, but remember that USB‑3.0 external SSDs are slower than internal ones.
Step‑by‑Step: Building a Dual‑Drive Setup
- Install the NVMe SSD in the M.2 slot; set it as the boot drive in the BIOS.
- Mount the SATA HDD in a 3.5‑inch bay; use a SATA cable and power connector.
- Format the HDD with NTFS or exFAT if you need cross‑platform access.
- Set up a backup routine: use the HDD for automated nightly backups of the SSD.
- Consider an external SSD for portable projects; keep it on a dedicated USB‑3.1 port.
Trade‑off: the NVMe drive is expensive but gives the best performance; the HDD is cheaper but slower. Pick the mix that matches your budget and workload.
Communication Peripherals: From USB‑C to Bluetooth
USB‑C hubs are now the standard for connecting multiple devices to a laptop. If you use a MacBook or a recent Windows laptop, a hub with a Thunderbolt‑3 port gives the fastest data transfer and supports external GPUs. Bluetooth 5.2 offers low latency for audio and low power for keyboards.
Common Mistakes
- Choosing a hub that only supports USB‑2.0; it will bottleneck modern SSDs.
- Ignoring the hub’s power delivery rating; a 60‑W hub can keep a laptop charged while you use a gaming mouse and monitor.
- Forgetting to check that the hub’s firmware is up to date; an update can fix compatibility with newer devices.
Decision rule: if you need to connect a 4K monitor and a high‑speed SSD, pick a hub that offers at least one Thunderbolt‑3 port and a USB‑3.1 Gen 2 port.
Practical Tips for Building a Cohesive Setup
1. Start with the core: pick a monitor, keyboard, and mouse that fit your primary use case. 2. Add audio and storage peripherals that complement the core without duplicating functionality. 3. Use cable management to keep the desk tidy; a simple Velcro strap or cable sleeve can hide wires. 4. Test each peripheral before committing: try a keyboard on a different desk or a headset with a friend’s laptop to catch compatibility issues.
What to do next: test your chosen mouse on a gaming rig to confirm latency; measure your monitor’s color accuracy with a calibration tool; run a quick benchmark on your SSD to verify read/write speeds.
FAQ
What is the difference between a peripheral and internal hardware?
Internal hardware is part of the computer’s core components – CPU, motherboard, RAM. A peripheral connects externally and adds extra functions like input or output.
Do I need drivers for all peripherals?
Most modern peripherals are plug‑and‑play and use generic drivers. However, high‑performance gaming devices often ship with specialized drivers for better control.
Can I use a peripheral with any computer?
Compatibility depends on the device’s interface (USB, Bluetooth, etc.) and the computer’s available ports. Always check the manufacturer’s supported systems.